Pages

Tuesday, 13 December 2011

How to make a Cupcake Bouquet, step-by-step!

As this is a question I get asked quite a bit, I decided to photo my latest cupcake bouquet every step of the way to show exactly how it's done. It's fairly easy to do and by using different colours and decorations you can create a beautiful bouquet that not only looks lovely but tastes great too! 

You will need:

A suitable container (I like to use metal buckets that are easily available from florist suppliers, they are approx 6" across - you could also use terracotta pots or anything else of a suitable size that takes your fancy), plastic disposable cups, various coloured tissue paper, sellotape and a stapler.
Optional: cellophane, ribbon, sugarpaste, elastic band, edible glitter.

You also, of course, need a batch of cupcakes plus enough buttercream to decorate them! You will only need seven but my recipe makes twelve so plenty to nibble on later ;)
This time I used good old vanilla for both cake and buttercream but you can use any flavour combination you wish.

Method:

To start off, you need 7 plastic cups, arrange them into this shape:

Now, at this point, you can either staple them together as they are or you can do as I did and wrap some tissue paper around each cup (sellotape comes in handy here just to keep in place) before stapling for an even lovelier effect, like this:
If you'd like to use cellophane, now is the time to wrap it around your pot as it's much more fiddly to do it later on - cut a big square of cellophane, turn your pot upside down and secure with an elastic band, don't worry that it looks awful, we can pretty it up later!


Next, take a sheet of a different colour tissue paper which will complement your icing colours, cut in half and lay out flat across each other:

Lay the tissue sheets over the top of your container and gently push your cup arrangement downwards pushing the tissue paper with it.

Ok, you're ready to ice your cupcakes! For these ones, I used a Wilton 2D nozzle in a piping bag and painted a stripe of red extra colouring up the seam of the bag before filling with buttercream to get a two tone effect with the icing.

Another optional bit now! To make the cakes a little bit more special, I rolled out some red sugarpaste and used a plunger cutter to make some flowers, added one to each cake and then dusted each cupcake with some edible glitter.

To assemble your bouquet, simply pop a cupcake into each cup holder! I then tied a length of red ribbon around the pot to cover that elastic band!
And there you have it, a gorgeous bouquet of cupcakes! Perfect for a present :)


Happy Baking :)


Saturday, 3 December 2011

Do something special this Christmas...

This has nothing to do with cakes and baking at all but it's a lovely idea that I wanted to share with you.

Recently I came across a website called Post Pals. The idea is to send a card or small gift to brighten up the day of a seriously ill child or their siblings. It doesn't take you long to do and imagine making a poorly child smile just for a little while - well worth the price of a stamp! At BakerLou, we have already sent a gift box full of our hamper goodies to one family so we hope it was enjoyed!

At this time of year Post Pals have a number of extra special schemes to make these brave children feel just a bit better. You can volunteer to write to a child from every reindeer during the festive period or you can become an Elf and send a gift around the value of £15 to a child who will really appreciate it. You can find all the details of how to help HERE. 

As part of the reindeer scheme, I am writing to a little girl who unfortunately lost her sister to a form of cancer, I've given each reindeer their own personality and put in a small gift with each letter! I'm also volunteering for the Elf scheme and I know that lots more helpers are needed so if you have the time, please think about taking part.


Of course you don't have to send a gift - I know money is tight these days - but even sending a card lets families know that someone is thinking of them so if you have a few minutes to spare and a stamp hiding in your purse, please use those few minutes to put a smile on a child's face! ☺

Happy Christmas from BakerLou!
         xxxxx

Tuesday, 25 October 2011

Win a Luxury Hamper!

Here at BakerLou, we are feeling a tad generous so we are giving you the chance to win one of our luxury hampers absolutely FREE! That's right - free, gratis, complimentary!


★All you have to do is head over to our facebook page, "like" the page and leave a comment stating why you should win a hamper! Nothing to it - easy peasy!!★

We will pick the most deserving entry and send the lucky winner a luxury hamper in the week leading up to Christmas to the address of their choice - so you could win for yourself or send as a gift! 

Good Luck!

UPDATE: Just to clarify - people who already like the facebook page will still be eligible to win, just make sure you leave a comment! Winner will be notified by 5th November 2011.


Monday, 24 October 2011

Christmas Craft Fair!

On Sunday 6th November, BakerLou has a stand at the Cat's Protection Craft Fair at Mill Hall, Rayleigh.
As the charity likes to sell cakes to make a profit themselves, we will be doing a display only, showing off our lovely cupcake towers, celebration cakes, cupcake bouquets and gift hampers.
However, we WILL be giving out lots of tasty free samples including several flavours of cakes plus a selection of goodies from our hampers.
So come along and see us, 10:30 am - 4pm

Our friends at jellypark will also be there selling their beautiful original painting and prints so plenty of choice for everyone! 
See you there!


Thursday, 13 October 2011

New Products in the BakerLou Store!

It's been rather an exciting week here at BakerLou and we are proud to announce some fabulous new gifts on our website!

✭Please note that there is limited availability on the hampers and we are already taking lots of orders. So get your order in quickly so you don't miss out!✭

First of all we have our gorgeous new gift hampers which are an ideal Christmas or birthday gift for a special person in your life. The contents of the hampers are all hand-made from scratch and will be delivered the week leading up to Christmas unless an alternative date is requested, these are available nationwide by Royal Mail Recorded Delivery.


To see more pictures or to place an order, find them here on the website.
You can also order by phone, email or through our facebook page

Also now in store, we have a range of Cupcake Bouquets which are a great gift to give someone special for any occasion, we think they're especially great for Valentine's and Mother's Day and would also make a perfect Teacher present! The bouquets can be customised to suit your personal taste and colour scheme. Find them in store here


In other news, we are booked to appear at a local Craft Fayre at Rayleigh Mill Hall on Sunday 7th November from 10:30am to 4pm. Here you can see examples of the products we offer, place orders and also pick up some tasty freebies - we will be offering taster samples of all our cake flavours and hamper goodies! Look forward to seeing you there :)


Friday, 7 October 2011

BakerLou Magazine!


With the help of my fab friend Claire from jellypark, I managed to work out how to make an online magazine to show off the lovely goodies we make here at BakerLou - what do you think? 
I'm very excited about it and have been showing it off as much as I possibly can!

Tuesday, 4 October 2011

1950's Gruesome Recipes!

Warning to Vegetarians - grab your sick bucket or don't read this!


Last night I couldn't sleep so I searched through my many bookshelves and found this old cookery dictionary - Cassell's Cooking Dictionary by Neil Heaton. It was published in 1953 and makes for highly interesting reading - well it does to someone like me anyway! I thought I'd put a few of it's recipes here, anyone brave enough to give them a try then please let me know...


So, anyone for brain cakes??????


BRAINS (Fr. cerveaux)- See, you get to learn French too! Brains must be thoroughly cleansed of blood and skin before use.
Brain Cakes
Ingredients:
Brains
2 eggs
Salt and pepper
1tsp chopped parsley
1 saltspoon each mace and cayenne

Method: Blanch the brains by soaking in salted water for 3 hrs, then boil for 15 mins to get them firmer. Chop up, place in a mortar with the parsley, mace, cayenne, salt, pepper and eggs. Pound together until a stiff paste is formed. Lay out the paste in small rounds 1½" in diameter, dip in egg and breadcrumbs and fry to a light brown.

Well, I don't know about you but the thought of making brain paste kind of goggles my, erm brain! 

I found this one slightly more disturbing though - that's right, it's time for...

...Boiled Calf's Head!

Are you still with me or do you need a minute in the bathroom?

CALF'S HEAD (Fr. tete de veau)
TO PREPARE. The calf's head requires considerable attention on the part of the butcher before the cook can deal with it. The head is soaked and scalded so that the hair can be removed, the bones are cut down and the eyes removed. The cook can then remove the brains and tongue. The brains are blanched and the tongue soaked in salted water until the blood is disgorged. The head is plunged into scalding water containing salt and vinegar. After a few minutes in this it can be taken out, again put into cold water, or dried with a cloth and left until wanted.
Calf's Head, Boiled
Ingredients:
Half or a whole head
Water
Salt
Vegetables, herbs and peppercorns
Bacon
Lemon
Parsley
Parsley Sauce

Method: Take the soaked head, place in a saucepan with sufficient water to cover. When it boils, add salt and remove scum as it rises. Add vegetables, herbs and peppercorns, and simmer gently for 2-3 hrs until tender. The brains must be removed, tied in muslin and boiled. Take out head, remove all bones and tongue. Place the head on a hot dish, coat well with Parsley Sauce, garnish with the skinned sliced tongue, chopped brains, fried bacon, quarters of lemon and parsley. Sufficient for 7 or 8 persons.


To be fair, this book covers the whole alphabet of cooking terms and ingredients so lots to learn along the way, and this stuff only seems gruesome to a modern cook like me! For instance did you know the term "barbecue" comes from the French barbe a queue which means beard to tail? No, I didn't either.

Let me know if there's any cooking terms or recipes you'd like me to look up, I'm sure I'll find an interesting answer ;)

Friday, 23 September 2011

Friday Recipe - Peanut Butter Cookies

Hi all!

In my last post I told you that I was going to try out some peanut butter cookies so here's the recipe if you fancy having a go yourself. They aren't lookers as they don't look pretty but so very moreish and I can't stop eating them (bang goes the diet!). This recipe is also fab as you hardly have to weigh anything, just use your trusty tablespoon...

Ingredients:

8 tbsp Plain Flour
2 Egg yolks
3 tbsp Crunchy Peanut Butter
3 tbsp Dark Brown Soft Sugar
Approx 75g softened Butter or Margarine

Preheat your oven to 180 degrees / Gas mark 4. Spoon out 8 tbsp of plain flour into your mixing bowl


Add 3 tbsp of soft dark brown sugar ( plus 1tbsp of caster sugar if you have a sweet tooth )


 Give it a good stir and break up any clumps of sugar


 Next add your peanut butter, I love peanut butter so I added 3 heaped tbsp but feel free to play about with quantities!


Add 2 egg yolks to the bowl


 Now add approx 75g of softened butter or margarine, you may need to add a bit more later.


Now the fun part! Stir it first if you like or just get your hands in if you don't mind getting a bit messy and work the mixture into a soft dough. If your mixture is a bit dry add some more butter, likewise if it's too sticky then add some more flour.


 This is the kind of consistency you want, it just needs to be sticky enough to roll with your hands into little ball shapes.


 Now shape balls of dough and place them on a lined baking sheet


 My batch made twenty but it depends on how big your balls are, so to speak!


Once you're done, just lightly flatten the cookies with the back of a fork. Don't worry if they crumble!

Once you're finished, pop them in the oven for around 10-15 minutes, they're ready when they're slightly browned.


This is how they look when they're finished, leave to cool on a baking sheet or transfer to a cooling rack.


If you want to pretty the cookies up a bit, dust with icing sugar or drizzle with melted chocolate.


Right, I'm off to eat another one! Happy Baking xx BakerLou Website

Thursday, 22 September 2011

Latest Cakes

It's been pretty busy here since the BakerLou website opened it's virtual doors, so now I have five minutes I thought I'd show you some of our recent cakes.

Firstly, I was designing some new fondant topped cupcakes and decided to send the children round our street to raise a bit of cash for the charity we are supporting - Clic Sargent who do wonderful work helping children with cancer. I arranged a few cupcakes on a tray decorated with some National Cupcake Week bunting, doesn't it look pretty?


The children must have looked fairly angelic as they managed to raise £21.84!
Don't forget that there is a 10% discount on all orders until 30th September plus a further 10% will be donated to Clic Sargent.
Today's order is for a little boy having his first birthday - Happy Birthday Cayman! The cake is sponge filled with jam and buttercream and the cupcakes are a selection of vanilla, chocolate and lemon. Yummy!

I'll post some more pics soon, but right now I'm off to try out a recipe for peanut butter cookies xx

Friday, 16 September 2011

Today's the Day! Win Stuff!

Today sees the launch of my new website BakerLou and as I'm so excited I want to celebrate!!

So there are four fab reasons to check out the BakerLou store today....


1) From today until 30th September, 10% of all sales will be donated to Clic Sargent - a charity that helps children with cancer - you can eat cake and help a good cause at the same time!

2) As a welcome gift, all orders placed until 30th September will receive a 10% discount!

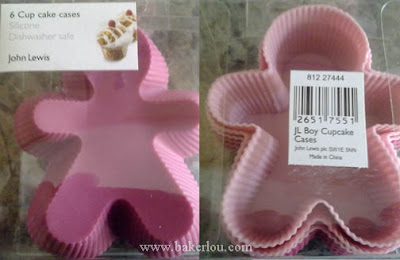
3) If you are on Twitter, look out for our competition tweet (@baker_lou) to win this gorgeous set of silicone cake cases from John Lewis:


All you have to do is find our competition tweet and retweet (RT) it to your followers, how easy is that?!  The name of everyone who enters will be put in a glamorous hat and the lucky winner picked at random. Good luck! You can also "like" our facebook page and leave a comment to enter

4) Because I really want you to! Go on, you know you want to make me happy!

Thursday, 15 September 2011

Nearly time!

Well, it's National Cupcake Week so what better time could it be to launch the new sparkly BakerLou website?

That's right, the new BakerLou site will be launched this week and to celebrate we will have some wonderful offers and goodies to be won so keep checking our facebook and Twitter feeds for more details tomorrow.

One of our promotional offers will be to donate 10% of all sales to charity*. This money will be going to the very worthy Clic Sargent who do wonderful work for children with cancer and their families.
*for any orders placed from Friday 16th September to Friday 30th September. Orders can be placed through the website, by phone (07905 161645) or by email (bakerloucakes@hotmail.com)

Click here to find out how you can help or for more information about the charity.

Also, I can't resist showing off my gorgeous new logo for BakerLou. This was designed by Claire Keay from jellypark. Isn't it fabulous?!


Claire does designs for all kinds of occasions and sells original paintings, prints, digital stamps, colouring posters and much, much more. Visit the jellypark store and take a look :)

Sunday, 11 September 2011

Recipe Time! - Gingerbread

I actually had a break from cakes the other day but still couldn't resist baking! As my daughter had an inset day from school, we decided to have some fun with gingerbread and cutters.


This is the recipe I use:

3oz (75g) Butter
5oz (125g) Soft Brown Sugar
3oz (75g) Golden Syrup
15oz (375g) Plain Flour
1tsp Baking Powder
2tsp Ground Ginger
1tsp Mixed Spice
1 medium Egg, beaten

Method:

Gently heat the butter, sugar and syrup in a saucepan until the sugar has dissolved, then leave to cool.

Once the liquid is around room temperature, mix in the dry ingredients and the beaten egg to form a soft dough. (If you find it's too sticky at this point it's fine to add more flour)

Knead your dough a little so it's nice and pliable and roll out on a lightly floured work surface to about 5mm thick. 

Use your favourite cutters and place onto a greased baking sheet.

Bake at 180 degrees / Gas mark 4 for approx 10-15 minutes.

The gingerbread is ready when it's slightly golden, they will still be soft when you remove them from the oven but will harden as they cool. They can easily burn so keep checking!

Decorate as you wish! You could use royal icing, ready made writing icing tubes, sweets or you could add raisin eyes and buttons before you bake, have fun :)

We had some royal icing left over so we played about with the piping bag...


Friday, 2 September 2011

Lego!

This week has been a busy one for celebration cakes and I'm not finished yet. One of the orders this week was quite an unusual request but hopefully I've pulled it off ok. A ten year old boy wanted me to put two of his favourite lego figures onto his cake and i was a bit apprehensive as I've not had much practice at modelling, thought I'd give it a go though.
These are the figures I was given as inspiration:

Not exactly easy for the novice modeller but this is how they turned out...

I was quite pleased with my R2-D2 but the lego man I found really hard, especially the head as you can probably tell from the picture!! Hopefully he'll like it though :)

Another cake this week was for a lovely neighbour of mine whose family have ordered it as a surprise for her, I hope she loves it as she's a wonderful lady - Happy Birthday Wendy!


So, still a few more cakes to go, a Percy Pig cake and this rather scary logo from a heavy metal band:

Did you guess that this one is for a teenager???!!!